Showing posts with label home decor. Show all posts

Wednesday, August 29, 2012

Make Your Own Pottery Barn Look-a-like Lamp

Why pay high prices for the looks that you like for your home? It is much more fun to recycle and redesign items into the looks you like. I fell in love with a Pottery Barn lamp. Needless to say it was well over $100.00. So I decided to make my own. I kept my eye out for lamps at the local Goodwill. During one trip I found matching wooden bases. Then all I needed were the perfect size of matching shades.  Bases, shades and the following items were all I needed to make my version of a "Pottery Barn" look-alike lamp:

Enough burlap to cover shades
White Flat Spray
Paint Black Flat Spray Paint
Paint Adhesive Spray Paint
Trim
Hot Glue Gun
Scissos


Find a base you like.
 
 
Spray a light coat of flat white spray paint.
 
 
Spray with flat black spray paint.
 
 
Sand off edges to allow the white to come through giving a  vintage look.
 
 
Next find a shade that has a good size and shape in proportion to base.
 
 
You will need enough burlap to cover shade.
 
 
Cut burlap to fit shaed.  (Note: You will need to cut on bias.)  Spray adhesive to fabric and cover shade.
 
 
Glue trim to give a clean edge.
 
 
And for less than $30.00 I have two lamps I love.  (And obviously my daughter loves them because somehow they ended up in her room!)
 
 
Leave comments with ideas you might like to share.


Friday, January 27, 2012

Make a Decorative Pillow (Learn to Cover a Pillow Form Tutorial)


Materials: Yard Sale or Thrift Pillows, Decorative Fabric, Sewing Supplies 
 
Remove fabric from form.


 Place pillow form on fabric.


 Cut square out around the form. Leaving enough edge for a 5/8 seam allowance.


 Should look like this.

Fold fabric that will be used for back of pillow. It will need to be as big as top piece plus a few extra inches.


Cut back out.

Cut back of fabric so that you have two unequal parts. 


Iron a 5/8 inch seam allowance on long side of each back piece.


Stitch


Should look like this.

Lay one back piece over the other. Over lapping about 3 to 4 inches.

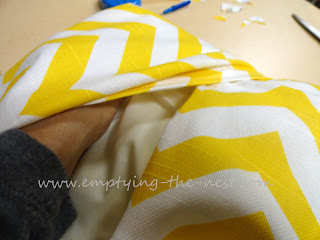
Place right side of pillow top piece on the back of overlapped pieces.


Cut off excess on each side.

Should look like this.


Pin around edges.


Stitch a 5/8 seam around pillow cover.


Raise pressure foot up with needle in down postition and pivot at corners


Clip each corner being careful not to clip seam.


This is what the back side will look like.

Turn pillow cover right side out and put pillow form into pillow cover.


And there you have it. So don't throw away those decorative pillows just because you are redecorating. Just transform them to match your new decor. 


Once you learn this simple technique for covering a pillow form you can get creative with various styles.  Print This Tutorial
Other similar projects:  DIY Pillow Forms


Sunday, January 22, 2012

Laundry and Life


Laundry is a bit like life.  Each day it builds from the day before.  There are things to be sorted out.  Sometimes there is dirt to be dealt with. Some problems need to be tended to quickly and others can be put at the bottom of the pile. Some items need to be handled with care while others can take a beating.  And if it's not tended to daily it will undoubtedly become overwhelming!

Wednesday, January 4, 2012

Fly Little Birds Fly!


So where did this blog come from?

Well, as I watch my daughters, ages 17 and 19, start to become independent young women ready to take on the world I realize I needed to find my way back into the world. Most of my time an energy has been devoted to being a mom. Approaching the empty nest is sad an exciting. While I choke back the tears as my daughters talk of moving out and moving on, I am told I need a hobby. So here I am. My attempt at fulfilling my days as I "Empty the Nest".